How to take screenshots and record your screen on any device | Sponsored By Vivo V Series
Save article excerpts, make demos, or document your tech problems the simple way—on an iPhone, iPad, Android device, Mac, Windows PC, or Chromebook.

Ideally, everyone would know how to take a screenshot on their phones and computers.
While screenshots and screen recording might seem like geeky features, they have all sorts of practical applications. You can use them to share article excerpts on social media, demonstrate how to do something on your device, troubleshoot your own technology problems, capture information that’s at risk of being deleted, or write an old-fashioned Notes app apology letter, among other things.
That may explain why Apple, Google, and Microsoft have all built convenient screenshot and screen recording tools right into their respective operating systems. Here’s how to use them, whether you’re on an iPhone, iPad, Android device, Mac, Windows PC, or Chromebook:
IOS/IPADOS
Screenshots: On iPhones and iPads that don’t have a home button, press and release the power and volume up buttons to take a screenshot. Otherwise, press and release the home and volume up buttons.
Once you take a screenshot, it’ll automatically save to your Camera Roll, but you can also tap the thumbnail preview for editing options. If you do this for screenshots in Safari, you’ll see a handy “Full Page” option to capture your current webpage from top to bottom as a PDF (it sometimes has trouble with particularly long, complicated pages).
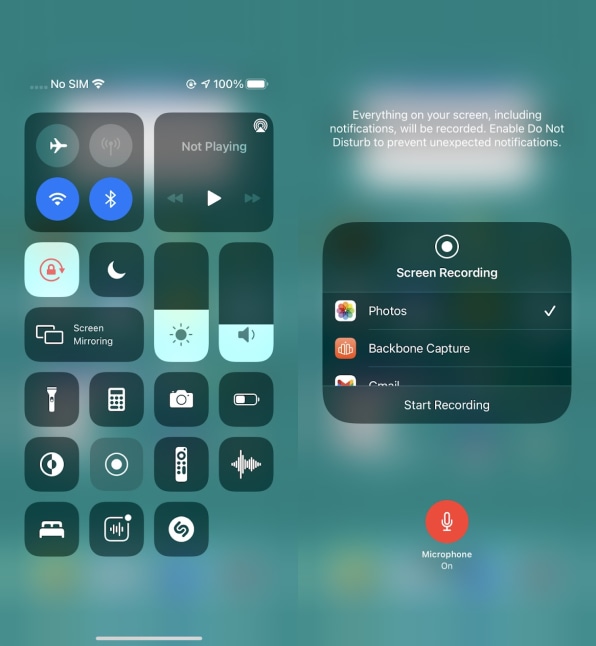
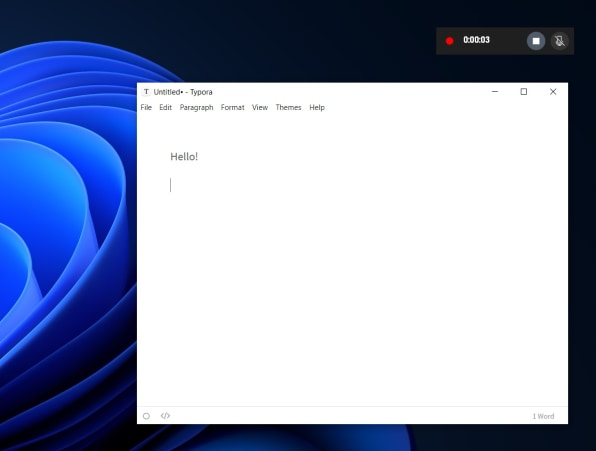
Screen recording: Swipe down from the top-right corner of the screen to bring up Control Center, then hit the circular record button to begin capturing the screen. (If you don’t see this option, head to Settings > Control Center, then adding Screen Recording” from the “More Controls” section.) You can also hold the record button for additional options, including a microphone toggle and the ability to share your screen in video chat apps, such as Zoom.
ANDROID
Screenshots: With the caveat that Android screenshot steps can vary by phone, you’ll most likely be able to take one by pressing power and volume down simultaneously. If that doesn’t work, try holding the buttons down. You can also ask Google Assistant to take a screenshot, either by saying, “Hey Google, take a screenshot,”or by swiping up diagonally from the bottom corner of your screen.
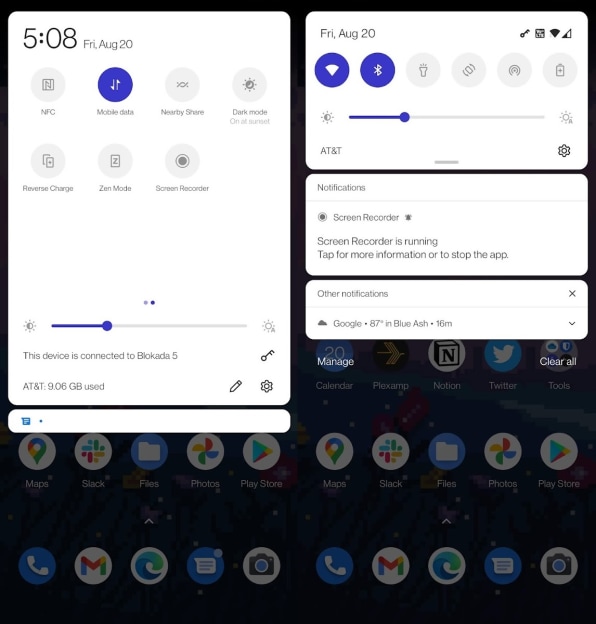
Screen recording: Swipe down twice from the top of the screen for your quick settings menu, then look for a “Screen Recorder” option. This is built into all devices running Android 11 or higher, and appears on some phones with earlier versions.
MACOS
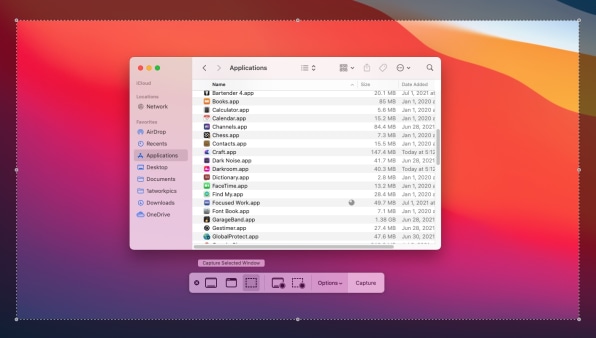
Screenshots: Press Cmd+Shift+3 to capture your entire screen, Cmd+Shift+4 to select an area to capture, or Cmd+Shift+5 to bring up a capture menu, where you can also choose screenshots for just a single application window.
By default, MacOS saves screenshots and recordings to the desktop. To change this location, head back to the Cmd+Shift+5 capture menu, select Options, then choose a different location under “Save To.”
Screen recording: Press Cmd+Shift+5 for the capture menu, then choose whether to record the entire screen or just a selected portion. Use the “Options” menu to record microphone audio, show mouse clicks, or set up a countdown timer. Once you’re finished recording, click the circular icon in the menu bar, where you can trim the footage.
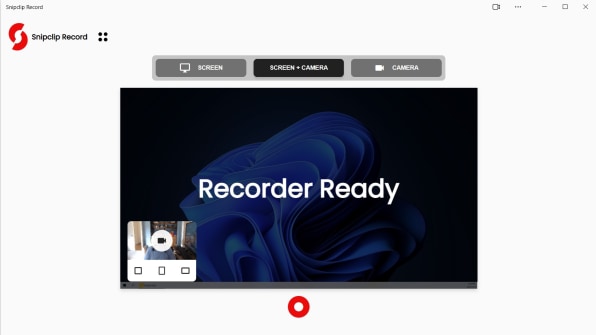
For more screen recording options, such as the ability to record a single application window or a specific browser tab, check out Snipclip Record, a free web-based app for screen recording. It can also capture system audio, and it supports recording yourself from a webcam in a thumbnail view at the same time.
WINDOWS
Screenshots: Press Shift+Win+S. The screen will dim, and you can draw a rectangle around the area you’d like to capture. You can also use the icons at the top of the screen to select a freeform screenshot, capture a full window, or capture your entire screen. Once you’ve taken a screenshot, just paste it into an image editor, such as Microsoft Paint, to edit and save.
Alternatively, press your keyboard’s Print Screen button to copy your entire screen, or press Alt+Print Screen to copy the current window. You can also press Windows+Print Screen to save a screenshot directly to your Pictures/Screenshots folder, with no pasting required.
Screen recording: Press Win+Alt+R, which will begin recording the currently-selected window. You’ll find these recordings in your Videos folder under “Capture.”
As with MacOS, Snipclip Record is a great web-based tool for additional recording options, including the ability to capture your full desktop, record from your webcam, and capture audio from your computer.
CHROMEBOOKS
Screenshots: Simultaneously press Ctrl+Window (that is, the icon that looks like several stacked-up boxes), or Ctrl+Shift+Window to capture just part of the screen. Got an external keyboard? Replace the Window key with F5. You can also press Ctrl+Alt-Window (or Ctrl+Alt+F5) for the capture menu, where you can choose to capture just a single window.
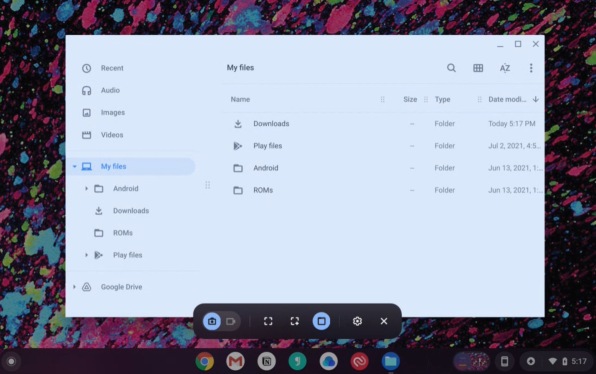
Screen recording: Use Ctrl+Alt+Window and click the camera icon, then choose whether to capture the full screen, a specific window, or a selected area. Then hit the gear icon to control whether the microphone is on or off.
Again, Snipclip Record works as a third-party option for recording your screen and webcam at the same time, or for recording the audio coming from your computer.
